Tips, Tricks, and Secrets for Mappack Makers

Mapping related threads and questions go in here!
User avatar
TurretBot
Posts: 4412
Joined: 15 Mar 2012, 23:18
Contact:

Post » 19 Dec 2013, 20:26

QwertymanO07 wrote:Or you can just use one NOT gate and not give it a power source...
Oh, crap. That's actually better. How did I not realize this?
Add this:
Battery:
Place a NOT gate, and don't give it a power source. It will send out a constant ON signal.
(And unlike real batteries, it never runs out.)
BTW I'm calling it a battery because in LPB2 there's a battery which does the same thing as this

User avatar
Automatik
Posts: 1073
Joined: 20 Jul 2012, 17:54
Contact:

Post » 19 Dec 2013, 20:35

It's like a redstone torch in Minecraft.

User avatar
TurretBot
Posts: 4412
Joined: 15 Mar 2012, 23:18
Contact:

Post » 19 Dec 2013, 21:02

Automatik wrote:It's like a redstone torch in Minecraft.
Well, except it can be anywhere you want.

User avatar
TheSeek
Posts: 486
Joined: 21 Mar 2012, 06:31

Post » 19 Dec 2013, 23:04

Maybe I'm dumb, but...any example of how it can be useful?
Lasers and Light Bridges are always on on their own, unless you connect them to an input.
Doors are always off(closed) when not connected to something, and making them always on(open) it's useless as you can simply not place the door...
If used with a Cube DIspensers it simply makes it drop a cube instantly, but you can either place a cube in the room without the need for a dispenser, or place a cube "inside"(near) the dispenser to make it looks like it will drop the cube instantly.
Gel Dispensers, Emancipation Grills, and other entities cant recieve an input.
So again, maybe i'm very, very dumb, but i can't find any use for this.

User avatar
TurretBot
Posts: 4412
Joined: 15 Mar 2012, 23:18
Contact:

Post » 20 Dec 2013, 02:28

The cube dispencer only makes a new cube when it actually dropped the cube that was destroyed.
Other than that, though, I guess you're right...

User avatar
maidenTREE
Posts: 653
Joined: 28 Mar 2013, 16:16
Contact:

Post » 12 Jan 2014, 06:07

Tip 1: Don't set the time limit very slow, unless it's a speedrun.
Tip 2: Also, don't be very hasty on the level design.
Tip 3: And try to draw the level design on a piece of paper at home, so it doesn't get left behind after school.
Tip 4: And don't try to copy someone else's ideas, unless you want a glitchy mappack with weird colors, and give credit for the level design.
Tip 5: And don't try to use too many tilesets, cause the ground might be purdy, so, use a few tilesets.
Tileset Tip Bonus: And don't try to make a very huge GIGA tileset. It won't show up on some computers, and no one wants purdy groundz.
Tip 6: And you can try merging tilesets, but give credit to the people who made/ripped those tilesets.

User avatar
HugoBDesigner
Posts: 2189
Joined: 19 Sep 2012, 02:23
Contact:

Post » 12 Jan 2014, 07:05

Turtley3 wrote:Tip 1: Don't set the time limit very slow, unless it's a speedrun.
Tip 2: Also, don't be very hasty on the level design.
Tip 3: And try to draw the level design on a piece of paper at home, so it doesn't get left behind after school.
Tip 4: And don't try to copy someone else's ideas, unless you want a glitchy mappack with weird colors, and give credit for the level design.
Tip 5: And don't try to use too many tilesets, cause the ground might be purdy, so, use a few tilesets.
Tileset Tip Bonus: And don't try to make a very huge GIGA tileset. It won't show up on some computers, and no one wants purdy groundz.
Tip 6: And you can try merging tilesets, but give credit to the people who made/ripped those tilesets.
No offense, Turtley, but your post was a little bit confusing to understand at the first time, so I'll try to "translate" it.
Tip 1: Unless you're making a "speedrun" mappack, try not to set the time limit of a level to a too small value. Your level will be better if the player has plenty of time to finish it AND enjoy playing it.

Tip 2: If you want a good mappack, you need to work well on it. Making it quickly, without thinking too much almost never is a good idea. Making good mappacks is something that requires planning, thinking and working carefully.

Tip 3: If you plan on doing a good mappack, it is very recommended that you draw the levels on a paper before doing it on your computer. This way you can organize yourself better (by maybe doing a folder with all the levels in paper) and you can change details better, even if you're not on a computer.

Tip 4: Be creative and original. If you see that your mappack is too much similar to an already existing one, avoid doing it. People will enjoy your mappack based on it's originality and different puzzles/scenarios.

Tip 5: If you make a mappack, make it simple. You can have a big tileset, but avoid making it too big, with more tiles than used or with details that you don't even need. Some computers don't support tilesets bigger than 512x512 pixels, so avoid making your tileset larger than this.

Tip 6: If you are going to use content created by other user (like tilesets, musics, backgrounds, etc.), ALWAYS give this user credits. People will like your mappack if they see you recognize the effort put by your content's author.

User avatar
MM102
Posts: 970
Joined: 11 May 2012, 06:08
Contact:

Post » 12 Jan 2014, 11:36

HugoBDesigner wrote: Tip 3: If you plan on doing a good mappack, it is very recommended that you draw the levels on a paper before doing it on your computer. This way you can organize yourself better (by maybe doing a folder with all the levels in paper) and you can change details better, even if you're not on a computer.
While this is good when you don't have access to a computer if you know how to use lunar magic I suggest planning levels in there instead since you can see a lot of a level at one time.

User avatar
BobTheLawyer
Posts: 2232
Joined: 01 May 2012, 21:00

Post » 12 Jan 2014, 20:20

MM102 wrote:
HugoBDesigner wrote: Tip 3: If you plan on doing a good mappack, it is very recommended that you draw the levels on a paper before doing it on your computer. This way you can organize yourself better (by maybe doing a folder with all the levels in paper) and you can change details better, even if you're not on a computer.
While this is good when you don't have access to a computer if you know how to use lunar magic I suggest planning levels in there instead since you can see a lot of a level at one time.
I'm just gonna' disagree with this (although I'm not much of a mapper)
I kind of just like taking the ideas from my head and start creating them. From there I critique myself and improve upon it. Usually I come up with a few puzzle ideas, then make it, then work on making it beautiful (I need to go back to my making my map)

ucenna
Posts: 615
Joined: 11 Jan 2013, 20:06

Post » 13 Jan 2014, 07:15

Well anyway I added them to the tips section. Except for rule 3 which is pretty much covered by Assasin's tip.

User avatar
Firaga
Posts: 931
Joined: 02 Jul 2012, 16:05
Contact:

Post » 13 Jan 2014, 16:12

Not much of a trick, but if the player's spawn point is in midair, as soon as the game starts, you can jump on nothing, as if there was a platform there for a split second.
Last edited by Firaga on 14 Jan 2014, 16:19, edited 1 time in total.

User avatar
Qwerbey
Posts: 1280
Joined: 05 Oct 2012, 07:58
Contact:

Post » 13 Jan 2014, 20:25

I don't know if this has been posted before, but I didn't see it in the OP: You can link things to cubes, and they will activate when the cube is destroyed. How long it stays on depends on the entity, but on antlines it seems like a second (I could be wrong on that).

User avatar
HugoBDesigner
Posts: 2189
Joined: 19 Sep 2012, 02:23
Contact:

Post » 13 Jan 2014, 20:33

QwertymanO07 wrote:I don't know if this has been posted before, but I didn't see it in the OP: You can link things to cubes, and they will activate when the cube is destroyed. How long it stays on depends on the entity, but on antlines it seems like a second (I could be wrong on that).
It is already in the OP, but not very clear though.
Also it depends on the velocity of the falling cube. It is destroyed after trespassing a certain limit under the map. If it gets 'til this limit quickly or not (thus activating stuff) depends on it's vertical speed.
That's what I think. I may be wrong though...

Anyway, here's a quick trick that wasn't shown before and I think it's considerably easy:
Ground light entities only flash for a second if linked to a toggling entity (like a switch). It may look weird if, along with the ground light (or indicator light) there's a wall indicator (which toggles instead of flashing for a second).
To fix that, put a laser facing towards a laser detector. Link the laser to the switch and the indicator lights to the detector. This way, they'll toggle just like any other entity.

ucenna
Posts: 615
Joined: 11 Jan 2013, 20:06

Post » 14 Jan 2014, 16:41

Firaga wrote:Not much of a trick, but if the player's spawn point is in midair, as soon as the game starts, you can jump on nothing, as if there was a platform there for a split second.
Seems like a trick to me. Added
HugoBDesigner wrote:
QwertymanO07 wrote:I don't know if this has been posted before, but I didn't see it in the OP: You can link things to cubes, and they will activate when the cube is destroyed. How long it stays on depends on the entity, but on antlines it seems like a second (I could be wrong on that).
It is already in the OP, but not very clear though.
Seemed pretty clear to me, unless you count the listings name, which wasn't particularly indicative. If someone posts a better listing I'll be sure to add it though.
HugoBDesigner also wrote:Anyway, here's a quick trick that wasn't shown before and I think it's considerably easy:
Ground light entities only flash for a second if linked to a toggling entity (like a switch). It may look weird if, along with the ground light (or indicator light) there's a wall indicator (which toggles instead of flashing for a second).
To fix that, put a laser facing towards a laser detector. Link the laser to the switch and the indicator lights to the detector. This way, they'll toggle just like any other entity.
Added

As a note, if people want I'd be willing to add sections for Mari0+ Portal and Alesan's entities.

User avatar
HugoBDesigner
Posts: 2189
Joined: 19 Sep 2012, 02:23
Contact:

Post » 14 Jan 2014, 17:06

Not meant to incommode you, but you forgot to add credits for me on Square Waves and on Groundlight Fix, and for Firaga on Spawn Jump. Sorry, just pointing out this...
ucenna wrote:As a note, if people want I'd be willing to add sections for Mari0+ Portal and Alesan's entities.
It'd be nice, I think. If you want, I can give you a few tips, tricks and secrets for my mod :)

ucenna
Posts: 615
Joined: 11 Jan 2013, 20:06

Post » 14 Jan 2014, 17:13

Whoops! I'll fix it!

Oh and I'd be happy to. Do you think it would be a better idea to make a new thread or just add it to this one?

User avatar
OrbitalBlueprint
Posts: 528
Joined: 08 Sep 2013, 20:11
Contact:

Post » 14 Jan 2014, 17:27

Not sure if this has been discovered before, but I found a way to glitch through a wall using an Aerial Faith Plate.


1. Build this in the editor:
Image
It's important that you put the Mario Spawning icon BEHIND the wall of course.

2. Go into the game and you might receive something looking like this:
Image
The Aerial Faith Plate actually works, it's just a retexture I made.

3. Pop two portals on both the faith plate and the floor like so:
Image
4. Jump into the portal NOT on the Faith Plate and voilà, you're inside a secret room!
Image

I don't really see this being incorporated into a puzzle, but I can see how it could make a good easter egg.

User avatar
Qwerbey
Posts: 1280
Joined: 05 Oct 2012, 07:58
Contact:

Post » 14 Jan 2014, 17:29

Actually, I think that was in What Not To Make, in the glitches level.

User avatar
HugoBDesigner
Posts: 2189
Joined: 19 Sep 2012, 02:23
Contact:

Post » 14 Jan 2014, 18:26

ucenna wrote:Whoops! I'll fix it!

Oh and I'd be happy to. Do you think it would be a better idea to make a new thread or just add it to this one?
Maybe that'd be just a "waste" of threads. Putting everything in a single thread would be better for users who decide to use some trick. Maybe making two new categories...


Anyway, here's a trick that already works in Mari0 +Portal v0.9.6 and some previous versions:
Ucenna's thread could have this wrote:
Setting up minimum/maximum amount of players per level:
You can set if a mappack can only be played by a certain amount of players by using Environmental Triggers and Commanders.
If you want a mappack to be played by 1 player only, for example, you can do this:
(E = Environmental Trigger; C = Commander)
E1: player2 playing
C1: player2 disable; Linked to: E1

And do the same with players 3 and 4.
If you want 2 players, do the same above but only with players 3 and 4. And, to check if player 2 is playing, do this:
(N = Not gate)
E2: player2 playing
N1; Linked to: E2
C2: player2 spawn [x] [y]; Linked to: N1

Still, you can change it to work as you want, and you can even display warning messages like:
"To play this mappack, you must have 2 players playing"
by using Overlay Data commands linked to Environmental Triggers, just like above.
I hope I could make it understandable...


Oh, and, related to this, you can make a "player spawning" button (like in most videogames, when you spawn player 2 by pressing start).
Just make an Environmental Trigger with the command "keypressed [key]" (soon I will try to add support to joysticks) and link to it a Commander with the command "player2 spawn [x] [y]". You can also add a flashing text by putting an Environmental Trigger with the command "timeloop [time on] [time off]" and some Overlay Data related Commanders, to show/hide the text.


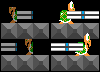
Should I make visual representations, so it becomes easier to everyone to understand?

User avatar
MagicPillow
Posts: 1108
Joined: 20 Jul 2013, 04:59
Contact:

Post » 15 Jan 2014, 00:19

You could set a max number of players by setting lives to 1 and having a pit next to the start, and then put 1-ups afterwards to set the lives more than 1.

ucenna
Posts: 615
Joined: 11 Jan 2013, 20:06

Post » 15 Jan 2014, 17:29

Okay I'll add em. I'm removing all spoilers in favor of spoiling entire sections (unfortunately, I can't nest spoilers).

User avatar
HugoBDesigner
Posts: 2189
Joined: 19 Sep 2012, 02:23
Contact:

Post » 15 Jan 2014, 18:46

ucenna wrote:Okay I'll add em. I'm removing all spoilers in favor of spoiling entire sections (unfortunately, I can't nest spoilers).
That's pretty bad. Spoilers in images really help to make things look more organized.
Hmm... What if Saso could try adding this feature (just like quotes already do)? Maybe he doesn't, but that'd be really useful...

User avatar
Qwerbey
Posts: 1280
Joined: 05 Oct 2012, 07:58
Contact:

Post » 15 Jan 2014, 20:18

New thing: If you're holding a box, you can walk through a laser emitter, but if you're pushing a box, you will get killed if you try to walk through the laser emitter.

User avatar
BobTheLawyer
Posts: 2232
Joined: 01 May 2012, 21:00

Post » 16 Jan 2014, 04:41

QwertymanO07 wrote:New thing: If you're holding a box, you can walk through a laser emitter, but if you're pushing a box, you will get killed if you try to walk through the laser emitter.
How would this help in level design, except maybe stoping people from using portals on a particular tile?

User avatar
Qwerbey
Posts: 1280
Joined: 05 Oct 2012, 07:58
Contact:

Post » 16 Jan 2014, 20:20

Maybe three situations, but for those three it's still useful to know.

User avatar
Qwerbey
Posts: 1280
Joined: 05 Oct 2012, 07:58
Contact:

Post » 20 Jan 2014, 05:38

Sorry for the double post but...
One way shells:
Image
If you place a half-koopa so that it it inside of a horizontal door, it can only be kicked to the opposing side of the door (and then to whatever is beyond the door).

ucenna
Posts: 615
Joined: 11 Jan 2013, 20:06

Post » 21 Jan 2014, 21:37

Hurray! Everything is mostly updated.

I added the cube on to cube know where just so you know.

@Alesan99
If you want a section for you mod you need only ask

@HugoBDesigner
Tell me if you ever want me to change your section.

User avatar
HugoBDesigner
Posts: 2189
Joined: 19 Sep 2012, 02:23
Contact:

Post » 21 Jan 2014, 23:14

ucenna wrote: @HugoBDesigner
Tell me if you ever want me to change your section.
It already looks pretty good, thank you!

So, a tip:

If your mappack doesn't have any elements from Mari0 +Portal other than custom textures, it is highly recommended that you make the levels on vanilla Mari0 and later add custom textures. Some features from Mari0 +Portal may not work on vanilla Mari0, so, to avoid bugs in vanilla, make them there first.


Another tip:

If your mappack DOES require Mari0 +Portal to be played, we recommend you that you make some level in vanilla Mari0, mostly to tell the player that he needs the mod to play that mappack. You can place the levels and the tileset from Mari0 +Portal in the "customlevels" folder, and you can, for example, add a "letters" tileset and make a "text" level on vanilla Mari0. This way, the game will not crash by loading your mappack, players that don't have Mari0 +Portal will know that they need the mod and you will still be able to play it normally on Mari0 +Portal...

User avatar
TurretBot
Posts: 4412
Joined: 15 Mar 2012, 23:18
Contact:

Post » 21 Jan 2014, 23:30

Going from what Hugo said, but more "in general" modding tips:
NEVER make 1-1 have a custom entity in it. Since it's the level loaded by the game in the mappack selection screen, if there's a custom entity the game will crash by just hovering over your mappack.

User avatar
HugoBDesigner
Posts: 2189
Joined: 19 Sep 2012, 02:23
Contact:

Post » 23 Jan 2014, 19:10

Trick for SE:

I you place an Excursion Funnel pointed to a button and put a cube above it (you can "block" the cube in a box of grid tiles too), and if you link the reverse power to that button, you can make it switch between push/pull funnel, making a kind of "levitator" for players, entities and enemies...

Image

User avatar
I LÖVE LUA
Posts: 222
Joined: 12 Aug 2013, 13:19

Post » 25 Aug 2014, 16:05

I found this trick with Mari0 SE :
You can go beyond levels #4 (examples : 1-5, 2-7, 8-8456416545) using animations.
Image
Plus I made a sideway warppipe using other animations. \(^o^)/
You can go up to level 9999999999.

User avatar
Wary
Posts: 598
Joined: 03 Jun 2012, 14:30

Post » 25 Aug 2014, 17:21


User avatar
I LÖVE LUA
Posts: 222
Joined: 12 Aug 2013, 13:19

Post » 26 Aug 2014, 10:28

The level input is 10 letters long, and

Code: Select all

string.len(9223372036854775807) == 19
so, you can go up to 9999999999.

Plus I am on a 32-bits Windows 7 (I also am on a 64-bits Mageia 4, but I didn't installed LÖVE 0.9) and I can go to 1-9999999999
Image<- Windows 7

User avatar
Sky
Posts: 1283
Joined: 08 Mar 2012, 04:35
Contact:

Post » 26 Aug 2014, 23:18

I LÖVE LUA wrote:The level input is 10 letters long
Not strictly. You can't see beyond 10 characters, but you can still type more and it will register. If nothing else, you can also edit the .json animation files in the mappack folder and change it to whatever you want. You can even change dropdown-menu-specific items this way.

User avatar
Qwerbey
Posts: 1280
Joined: 05 Oct 2012, 07:58
Contact:

Post » 30 Dec 2017, 09:18

It's been a while, hasn't it?

In SE, you can create a hidden timer by passing your input through an RS Flip Flop set to reset by a Delayer that is triggered by the Flip Flop itself. That may have sounded complicated, but it's basically a loop, like in the image. Ultimately, the only major difference is that the timer can't be reset by pressing the button while the timer is active.

Image
Inputs are drawn below the triggering entity.

User avatar
HugoBDesigner
Posts: 2189
Joined: 19 Sep 2012, 02:23
Contact:

Post » 09 May 2021, 03:15

Hello again!

Here are some new vanilla 1.6 tricks for the exactly zero of you who still play that version:

This can apply to inputs other than buttons too, but basically, an input that never turns off once it goes on. Similar to my cube on light bridge approach, but faster and easier to hide.

Connections:
Image

In-game:
Image
.
It's a shame that vanilla 1.6 doesn't have grating by default. But if you don't want to use light bridges, here are a couple approaches.
First, the more elegant one: falling platform.

Placement:
Image
(To make your life easier, make sure they're all 1.5 blocks wide - it's already the default setting, so just don't change that)

Next, open your level in your preferred text editor, locate all instances of "1.5" (if your level has other "1.5" entities, double-check which ones you're replacing), then replace them with "1":
Image

In-game:
Image

Alternatively, you can use springs for the same effect, though it's less "hide-able":
Image
.
A combination of springs and lasers works as spikes, in the sense that cubes can be placed on top of them with no effects, whilst the player dies on touching them. "Spikes" can be crossed by platforming through cubes.

Placement:
Image

In-game:
Image
.
This is a very, very niche thing. But if you place the player spawn right next to an axe, the player will start moving forwards automatically, just like in an intermission level. However, this "intermission" is limited in time, and does not require a pipe warp at the end.

Placement:
Image

For it to work seamlessly (no Toad or dialogue), you will need the level to be expanded to 50+ blocks:
Image

You can then place a solid block anywhere you wish the player to stop:
Image

Do keep in mind, however, that if you want to avoid the screen scrolling, you will need to place the solid block 13 blocks away from the start, or sooner:
Image

In-game:
Image
.
My previous gel dispensing mechanism had the light bridge visible, and used two of them for some reason. However, it is possible to place a light bridge facing the gel spawning entity, and due to the rendering order of entities, the bridge will be completely concealed behind the gel dispenser. You can block the bridge with either an invisible block (when you know the player can't/won't hit their head there) or with a regular solid block.

Connections:
Image

In-game:
Image
.
This one also applies to SE, since cubes can't be changed to not auto-respawn there for some reason. The logic behind this one is nearly identical to the gel dispensing mechanism, the only difference being that a timer is required this time.

Connections:
Image

In-game:
Image

Alternatively, you can just use the bridge itself to control the spawning of the cube, which is visually better, since you can always see the cube on the dropper this way. Downside is that it takes an extra NOT gate to trigger the cube spawner for the first time (that or a "companion cube" placed somewhere where it dies instantly).

Connections:
Image

In-game:
Image

Post Reply